

Nefra, Who Bars the Way | Gate Commander Draxus | Grob'Thok, Who Feed the Forge | Corruptor Zero | Dread Master Brontes
Mechanics:
Adds
The D-03 Repair Droids, the (Strong) D-02/D-09 Corruption Droids, and the (Elite) D-15/D-13 Corruption Droids are immune to stuns, knockbacks, grapples, and crowd controls. Can still be interrupted as normal.
Unified Beam
Unified Beam
During the encounter, Corruptor Zero will jump into the air and land into one of the four quadrants of the room. Corruptor Zero will then cast Unified Beam, a 1.5 second attack that will deal massive damage to anyone in its direct path.
In addition to the sub-25%, four part Unified Beam that occurs in Story mode and Hard mode, Nightmare mode introduces a single cast Unified Beam three additional times throughout the fight. He will do one beam (not four) that should be avoided and then the raid should continue mechanics as normal.
First Unified Beam - When Corruptor Zero spawns
Second Unified Beam - Sub-70%
Third Unified Beam - Sub-40%
Fourth Unified Beam (x4) - Sub-25%
As in previous versions of Corruptor Zero, after the sub-25% Unified Beam, most mechanics (adds, Unified Beam, Concussion Mines) stop and the fight becomes a burn phase.
Concussion Mine
Nightmare mode introduces two Concussion Mines into the equation for players greater than 5m from the boss.

Individuals must not remove Concussion Mine simultaneously due to the introduction of a debuff called Nightmare Concussion Mine. Full information below in the next section.In addition, DPS need not worry about pushing Corruptor Zero into the Unified Beam phase while mines are out as he will continue to stay grounded until the debuffs are removed.
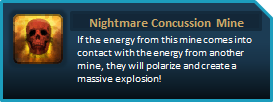
Nightmare Concussion Mine
In addition to normal mechanics, players with Concussion Mine also receive a debuff called Nightmare Concussion Mine.
As such it is important that individuals spread out throughout the fight, especially during add phases where it is easy to clump together. Because the mine only seems to target players greater than 5m from the boss (unless everyone is stacked), tanks will rarely get the mine unless they are out of melee range, so standing close to one another will not be fatal.
Corruption Nanites
As in hard mode, Corruptor Zero will apply a stacking Corruption Nanites debuff on the tank with aggro, increasing damage taken from Zero at an undefined scale.
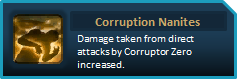
Tanks should swap at around 4 stacks (or whenever the previous tank’s debuffs expire) to minimize tank damage throughout the encounter. This is one of the only core mechanics that remains after the four-part, Fourth Unified Beam.
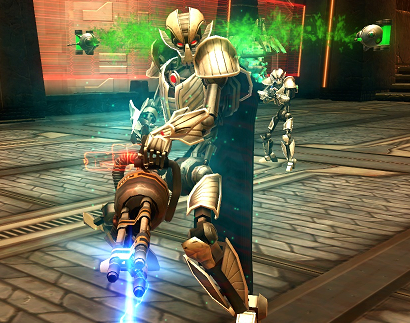
Melee Mode
Corruptor Zero begins the encounter in Melee mode and will spawn range adds (THREE Strong D:02 Corruption Droids, ONE Elite D:15 Corruption Droid, and TWO regular D:03 Repair Droids) while under the effects of the mode.

Corruptor Zero will later switch to Range mode, granting new mechanics and a new set of adds to deal with.
Corruptor Zero will later switch to Range mode, granting new mechanics and a new set of adds to deal with.
 |
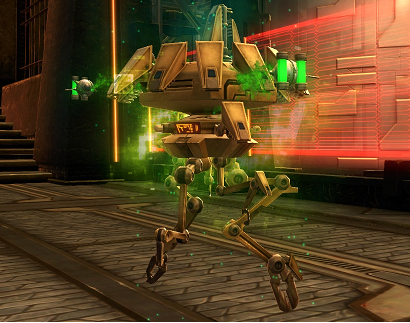
Corruptor Zero (Melee Mode)
Health: 2,574,794
|
Slash Attack
Corruptor Zero’s basic attack while in Melee mode.
Sweeping Slash
--
Massive Slam
A speedy (.5 second) cast which deals moderate area damage to anyone in close proximity to Corruptor Zero.
Heavy Slash
A channeled (3.5 second) cast on the tank currently holding Corruptor Zero, dealing a high volume of damage and leaving a Bleeding (Physical) damage over time effect that deals quite a bit of internal damage.

Should be cleansed ASAP to avoid excess tank damage.
Should be cleansed ASAP to avoid excess tank damage.
 |
D:02 Corruption Droid x3 (Melee Mode)
Health: 47,855
High Velocity Round
A basic ranged attack (.5 second cast) cast dealing minimal damage.
|
 |
D:15 Corruption Droid x1 (Melee Mode)
Health: 175,562
An interruptable (2 second) cast which places a small red circle underneath whoever currently has aggro, knocking down anyone hit by the telegraph and dealing moderate damage (~4-5k).
|
 | D:03 Repair Droid x2 (Both Modes)
Health: 28,092
Nano-Repair Droids
Casts Nano-Repair Droids, an instant cast heal over time that stacks to 2.  Major Reconstruction
Casts the direct heal Major Reconstruction, a 2.5 second cast which heals for ~5.5k HP.
|
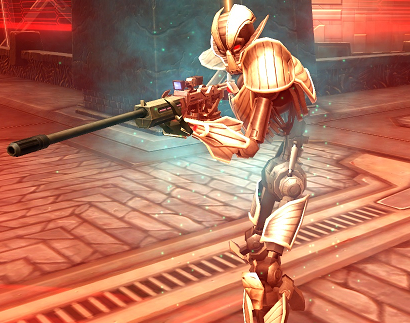
Range Mode
Corruptor Zero will swap to Range mode after Melee mode and will spawn melee adds (THREE Strong D:09 Corruption Droids, ONE Elite D:13 Corruption Droid, and TWO regular D:03 Repair Droids) while under the effects of the mode.

Corruptor Zero will later switch to Melee mode again, regaining the original mechanics and adds.
Corruptor Zero will later switch to Melee mode again, regaining the original mechanics and adds.
|
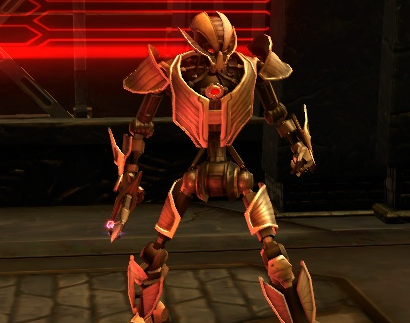
Corruptor Zero (Range Mode)
Health: 2,574,794
|
Corruptor Zero’s basic attack while in Range mode.
Missile Barrage
Missile Barrage is a 3 second cast which, upon completion, spawns a raid wide (proximity) area of effect ability, centered around and following each player in the raid group. Excessive stacking will dramatically increase the amount of raid damage received during this ability. In Nightmare, Missile Barrage is telegraphed with a small, red circle under each player.
Anti-Gravity Field
Functions the same as hard mode. A proximity area of effect ability centered around Corruptor Zero cast over 3 seconds. At the end of the cast, anyone caught in Anti-Gravity Field will be lifted and stunned, and then knocked back for massive damage.

Bug
|
As with other iterations of this fight, the telegraph for Anti-Gravity Field is deceptively smaller than the actual effect and prone to latency trolls. Continue moving well past the telegraph and try jumping if you’re near the edge for maximum survival.
|
A channeled (4 second) cast on the tank currently holding Corruptor Zero, dealing a high volume of damage and leaving a Burning (Tech) damage over time effect that deals quite a bit of elemental damage.

Should be cleansed ASAP to avoid excess tank damage.
 |
D:09 Corruption Droid x3 (Range Mode)
Health: 43,818
|
 |
D:13 Corruption Droid x1 (Range Mode)
Health: 56,521
An interruptable (1.5 second) cast which places a small red circle underneath whoever currently has aggro, knocking down anyone hit by the telegraph and dealing moderate damage (~7-8k).
|
| D:03 Repair Droid x2 (Both Modes)
Health: 28,092
Nano-Repair Droids
Casts Nano-Repair Droids, an instant cast heal over time that stacks to 2. Major Reconstruction
Casts the direct heal Major Reconstruction, a 2.5 second cast which heals for ~5.5k HP.
|
Overview
For all the various mechanics listed above, the Corruptor Zero encounter itself is quite rudimentary and not a huge leap in difficulty from its hardmode counterpart. Compared to the previous two encounters, the Corruptor Zero fight is significantly easier and one of the simplest boss fights in Nightmare Dread Fortress (second only to Nefra).
Despite its comparative ease, all raid member are required to remain constantly vigilant throughout the fight for the various mechanics they need to deal with. The most difficult aspect of the fight is internalizing the following two ideas:
1. Standing at range and near other players will get everyone killed.
2. Not knowing where you are spatially when the Unified Beam occurs will get you killed.
Sounds simple, right? It is, but don’t be discouraged if it takes a few attempts to lock in these ideas.

Guard
|
Tanks should Guard healers for this fight, as the frequent spawning of adds can cause them to grab initial healing aggro and pummel them with damage.
|
Setup
The first step for setup prior to engaging the boss is to create a priority list to coordinate the removal of Concussion Mines, as Nightmare removal requires a bit of finesse rather than brute force. Our strategy is to prioritize the tanks first (for the rare occasion that they do get it), then healers (who are typically second closest to the boss and could do without the extra beating), then range DPS and last melee (give Vanguard/Powertech and Shadow/Assassin preference over melee classes with a charge ability).

Important
|
Personal and raid preferences can alter this priority order; for example replacing a particularly sluggish healer (Commando/Mercenary) for a faster DPS (Sage/Sorcerer).
|
A common tactic is to give priority to left raid group over right and top over bottom, as indicated in the graphic below:
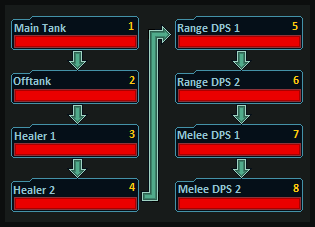
Assign each DPS player to a specific job or priority list for add duty. A typical setup for a raid group may appear as follows:
- Range DPS 1
- Interrupt/Kill Left D-03 Repair Droid
- Clean up remaining D-02/D-09 Corruption Droids
- Range DPS 2
- Interrupt/Kill Right D-03 Repair Droid
- Clean up remaining D-02/D-09 Corruption Droids
- Melee DPS 1
- Interrupt/Kill Elite (Gold) D-15/D-13 Corruption Droid
- Clean up remaining D-02/D-09 Corruption Droids
- Melee DPS 2
- AOE burn D-02/D-09 Corruption Droids
- Whatever is left
 |
Inspiration/Bloodthirst
Corruptor Zero offers little opportunity to get 100% effectiveness from Inspiration/Bloodthirst. Fortunately, the DPS requirements are light enough that usage is a matter of preference. Because it is possible to utilize two during the fight, the first should be used right after Zero lands from the first Unified Beam and then the second whenever it is available (typically sub 30%). |
The two range DPS players should absolutely prioritize killing the two D-03 Repair Droids first, as their healing can make it exceptionally difficult to chink the armor of the stronger adds.
When both D-03 Repair Droids are dead, the range should assist in clearing out any remaining D-02/D-09 Corruption Droids and then continue to burn the boss.
Melee DPS 1: D-15/D-13 Corruption Droid
Assign one DPS, preferably melee, to the Elite (Gold) D-15 and D-13 Corruption Droids. The D-15 Corruption Droid is a range mob which spawns during Corruptor Zero’s melee mode, while the D-13 Corruption Droid is a melee mob which spawns during Corruptor Zero’s range mode. Both D-15 and D-13 mobs cast a similar ability (Missile Salvo and Electric Burst respectively), which is a 2.0/1.5 second cast which places a small red circle underneath whoever currently has aggro. When the cast completes, anyone hit by the effects of Missile Salvo/Electric Burst take moderate damage and are stunned in place for x seconds.
Important
|
A Sentinel/Marauder specialized in the Watchman/Annihilation skill tree with Watchguard/Subjugation can interrupt every single Missile Salvo cast of the D-15 Corruption Droids, due to their 6 second interrupt. A Vanguard/Powertech specialized in the Tactics/Advanced Prototype can also achieve a 6 second interrupt through the talent Frontline Defense/Hitman, but putting points into this talent can cost valuable DPS talents and should not be required.
It is mathematically impossible to interrupt every single Electric Burst cast of the D-13 Corruption Droids without aid of Force Leap/Force Charge. Even if the interrupter waits until the last moment, 1.49 second cast + 4 second lockout with interrupt equals 5.49s, half a second short of interrupt cooldown! Luckily, the reduced health of the D-13 Corruption Droids makes interrupts less dangerous.
|
It is recommended that whomever is assigned to deal with the D-15/D-13 Droids position themselves safely away from tanks and the rest of the raid. If a cast gets off on accident, or a class without a 6 second interrupt is assigned to them, stunning the tanks can be detrimental and wipe the raid, especially during Anti-Gravity Field.
The melee assigned to this role should be weary of their increased likelihood of getting a Concussion Mine while outside of melee range of the boss.
Melee DPS 2: D-02/D-09 Corruption Droids
While the job is fundamentally simple and a hell of a lot of fun for number-padding, it is still a very important task. Especially if there are no tanks assigned to add management, the threat generated on every add will protect the healers from taking too much damage. Try to tag each add prior to burning them down, and use defensive cooldowns to supplement your survivability as this player will likely take a high volume of damage. Vanguards/Powertechs and Guardians/Juggernauts are perfect for this role.
The melee assigned to this role should be weary of their increased likelihood of getting a Concussion Mine while outside of melee range of the boss, as well as positioning themselves away from healers and ranged DPS, who may be preoccupied and unable to see that you’ve moved on top of them.
Tanks and Positioning
As discussed previously tanks should swap at around 4 stacks of Corruption Nanites to minimize damage. Whoever is not currently tanking Corruptor Zero should stand to the side or behind the boss to avoid cleave damage.
Having a standard tank position is not always optimal due to the randomness of Unified Beam locations. Instead, tanks should aim for bringing Corruptor Zero to the nearest corner to where his Unified Beam occurred. Such practice will minimize movement and allow for quicker repositioning/spreading of range and healers, as well as max uptime on the boss.
After the hell that is Grob’thok, tanking Corruptor Zero is a breeze. Tanks currently not tanking the boss can either help manage adds (DPS should be able to handle this though) or serve a more managerial role by calling out Concussion Mine (complete with cleanse order; example - “Mine, Bob… Sally”), boss percentages, adds dropping, etc. While this may seem trivial, it will greatly aid DPS and healers who may be distracted with more imminent threats to survival.
Sub-25% Unified Beam x4 (AKA “Quad Beam”/“Offensive Weapons Level: Omega”)
As in hard mode, pushing Corruptor Zero past 25% (can take as low as sub-20% depending on adds and mines) will force him into a soft enrage and causing him to jump into the air for his four-part Unified Beam. and spawn SIX D-09 Corruption Droids (melee mobs). The entire raid should hug whichever corner Corruptor Zero was most recently tanked at and strafe back and forth between alcoves as illustrated in the graphic below:
 |
| (Click to Enlarge) |


How do you feel about LOS'ing the groups of ads that spawn by hiding from them around a corner pillar?
ReplyDeleteIn theory this forces them to walk to us in a big group for either being AOE'd down or... just so we don't have to leave the boss for fear of getting a mine...
I should preface this with: "I didn't see this in your guide, therefore I am assuming your answer will be this isn't recommended for reasons X, Y and Z"
Thanks,
Aphex'twin from Shadowlands